- backstitch Knowledge Base
- Content Organization & Customization
- Studio - General
Creating Categories in Studio
Need to organize your things a bit more? Follow these instructions to learn how!
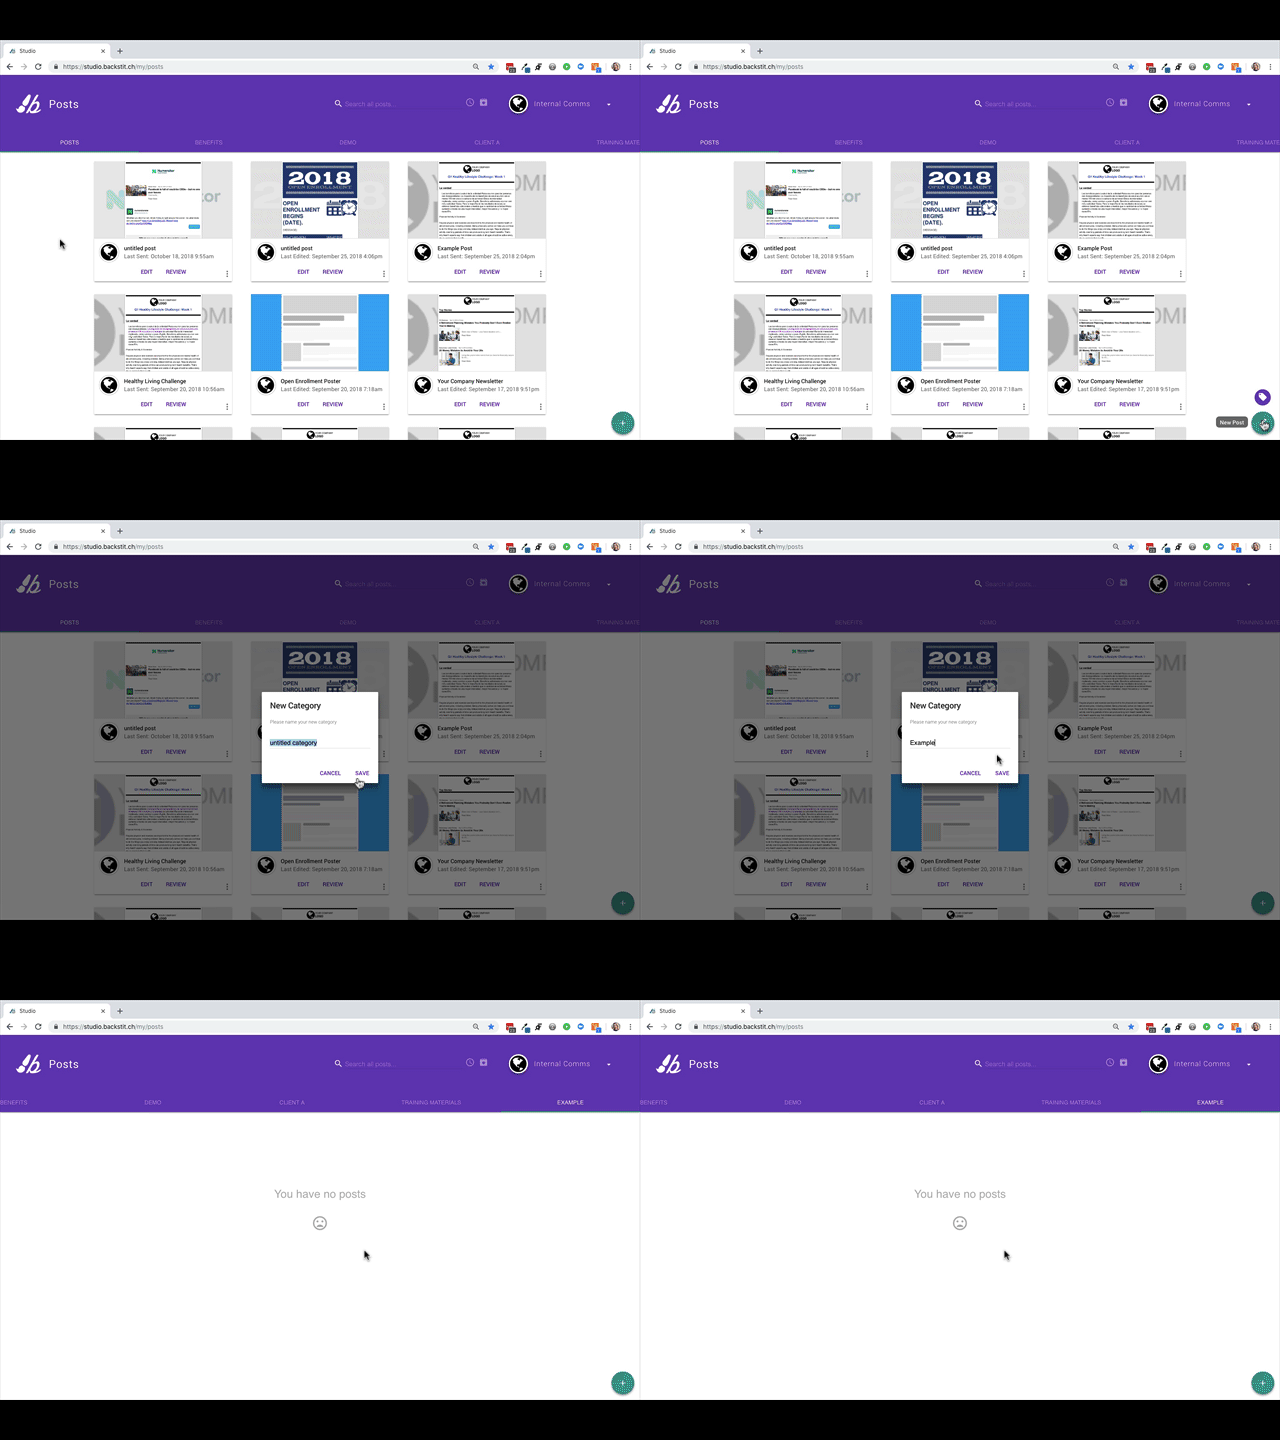
- First, make sure you are at the main navigation screen, where the banner is purple.
- From there, hover over the teal [Plus] icon at the bottom right corner of your screen. A purple [Tag] icon shows up right above the [Plus] icon.
- Click on the [Tag] icon. Then in the dialogue box in the middle of your screen, fill out the name of your Category.
- Select [Save] and your Category is created!

