Hello! We’re happy your organization has decided to enhance its internal communication strategy by using backstitch.
Now, you’re ready to get started and ensure that your employees have instant access to the information that matters to your business — including announcements, event information, company updates, industry trends, personalized content and more!
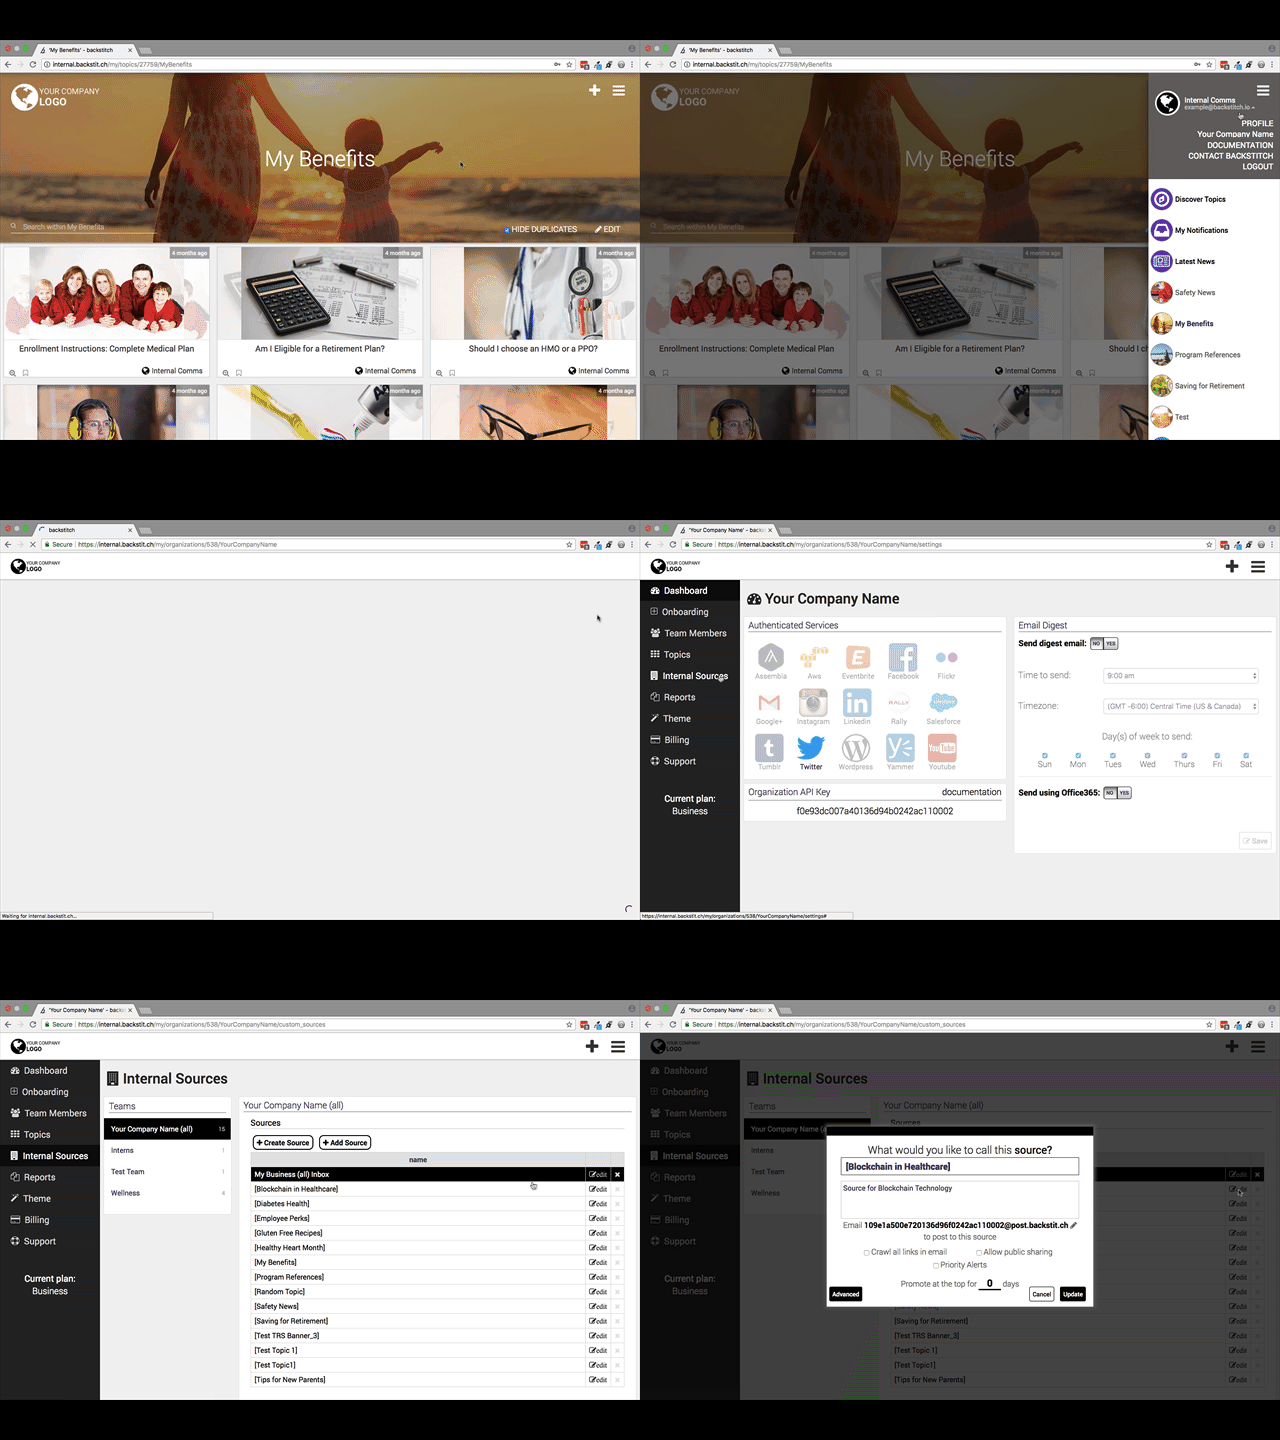
Step 1: Access Administrative Settings
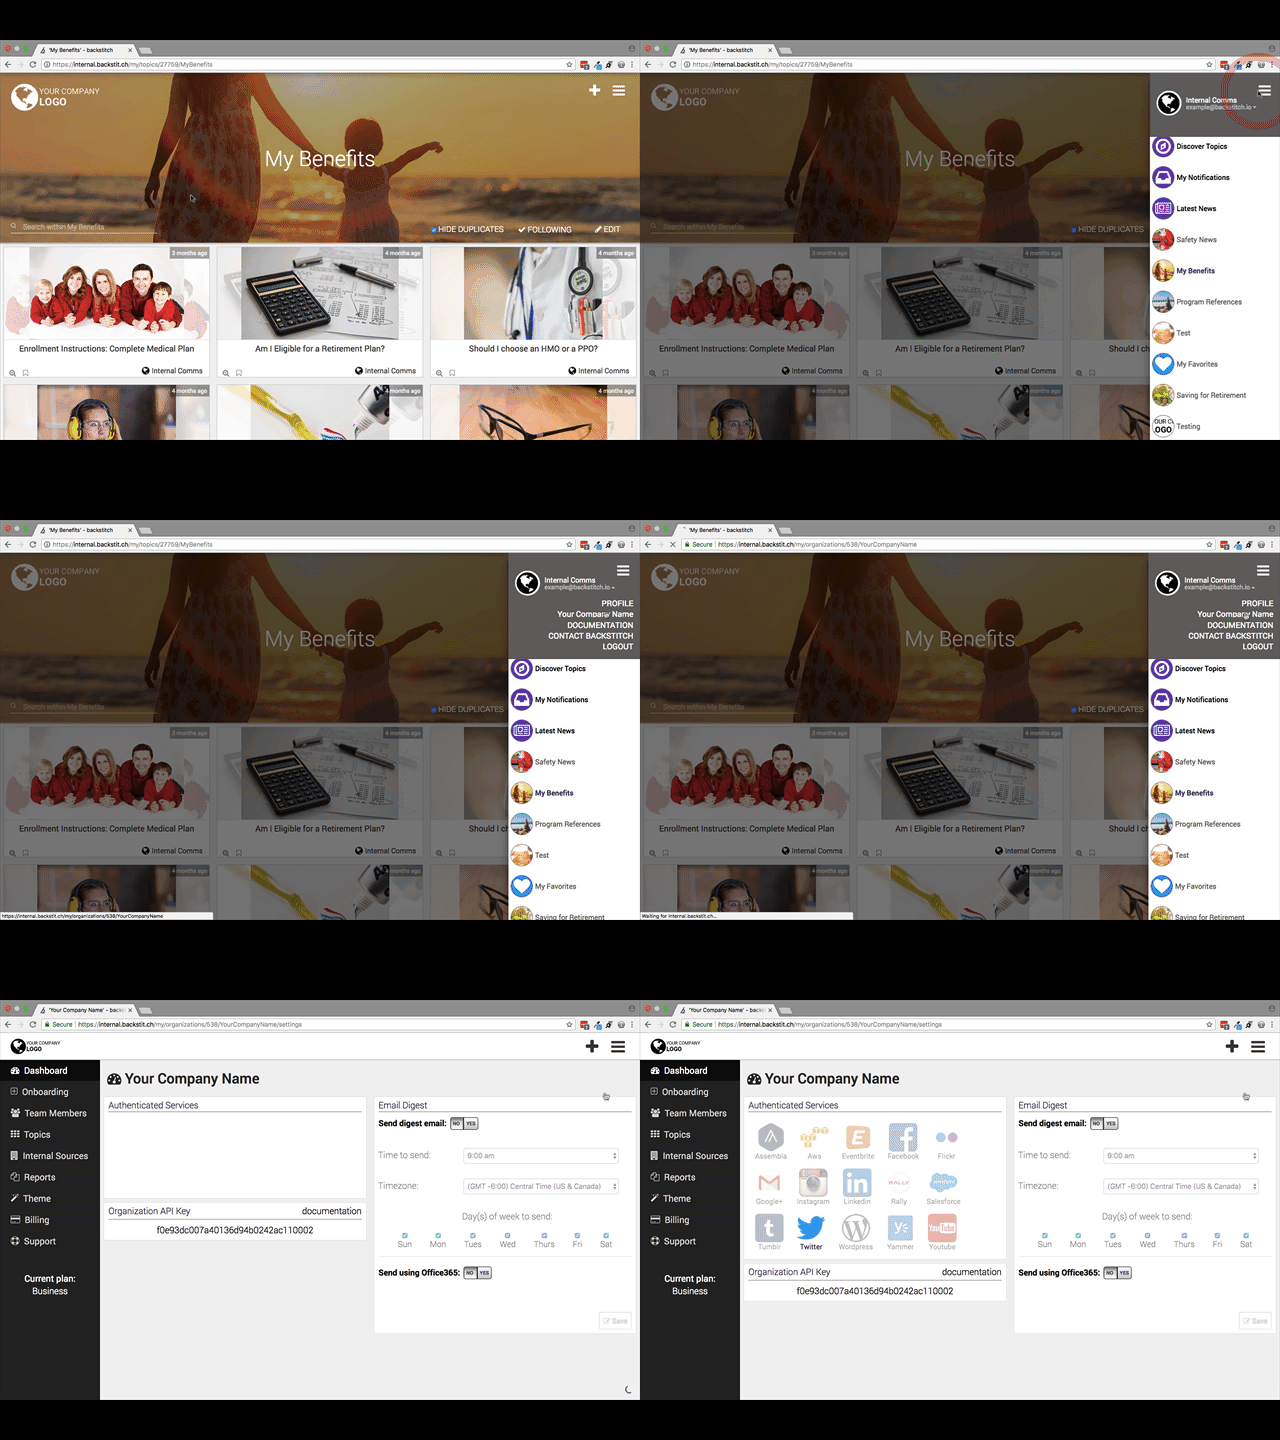
- Once you’re logged into the system, the first thing to do is access the Administrative Settings.
- To do so, click on the [Hamburger Menu] on the top right corner. From there you will see your organization's name, click on it to access the Admin Dashboard.
Step 2: Navigate your Organization Dashboard

- Your dashboard shows a navigation sidebar on the left, services you can authenticate in the middle, and a Widget that helps you create an auto email digest on the right.
- Currently, backstitch can integrate with different applications, including: Assembla, AWS, Eventbrite, Facebook, Flickr, Google+, Instagram, LinkedIn, Rally, Salesforce, Tumblr, Twitter, WordPress, Yammer and YouTube.
Step 3: Adding Team Members
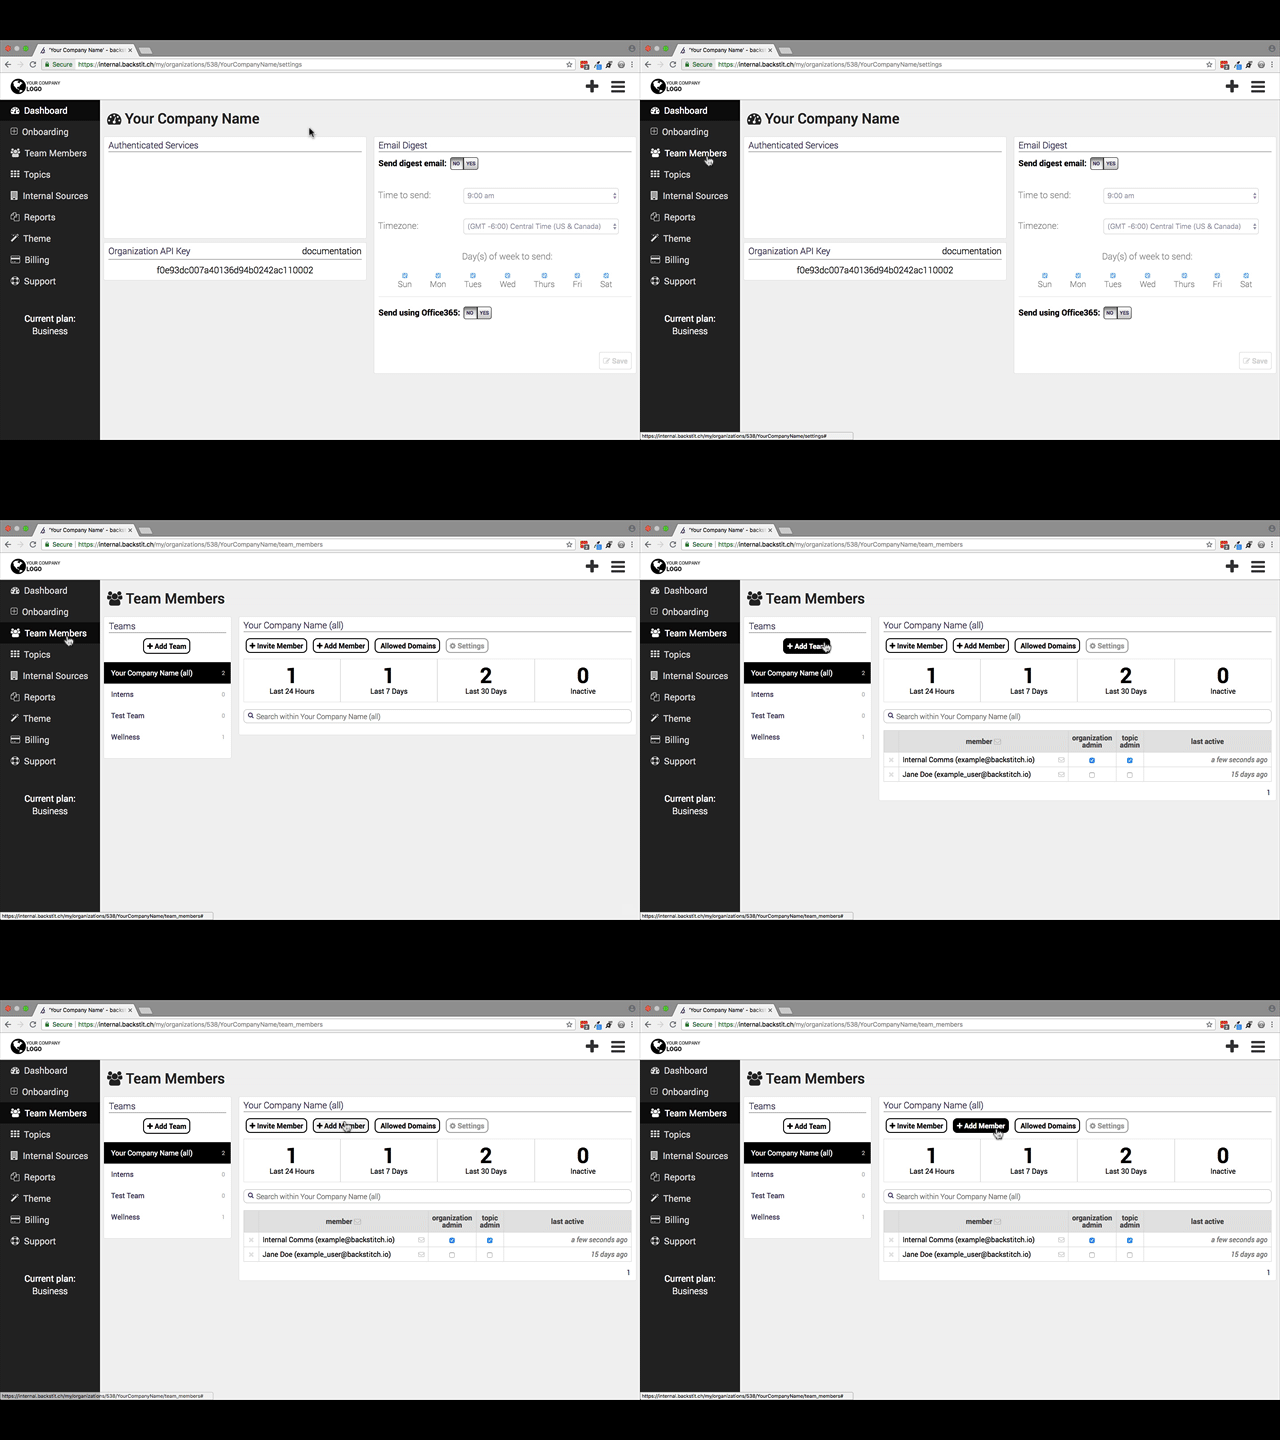
- Click on the [Team Members] button on the left sidebar to manage Teams and add Team Members.
- Here, you can create new Teams and view Teams as well as manage Team Members.
Click here for a more in depth look at how to create Teams.
Step 4: Manage Topics and Teams
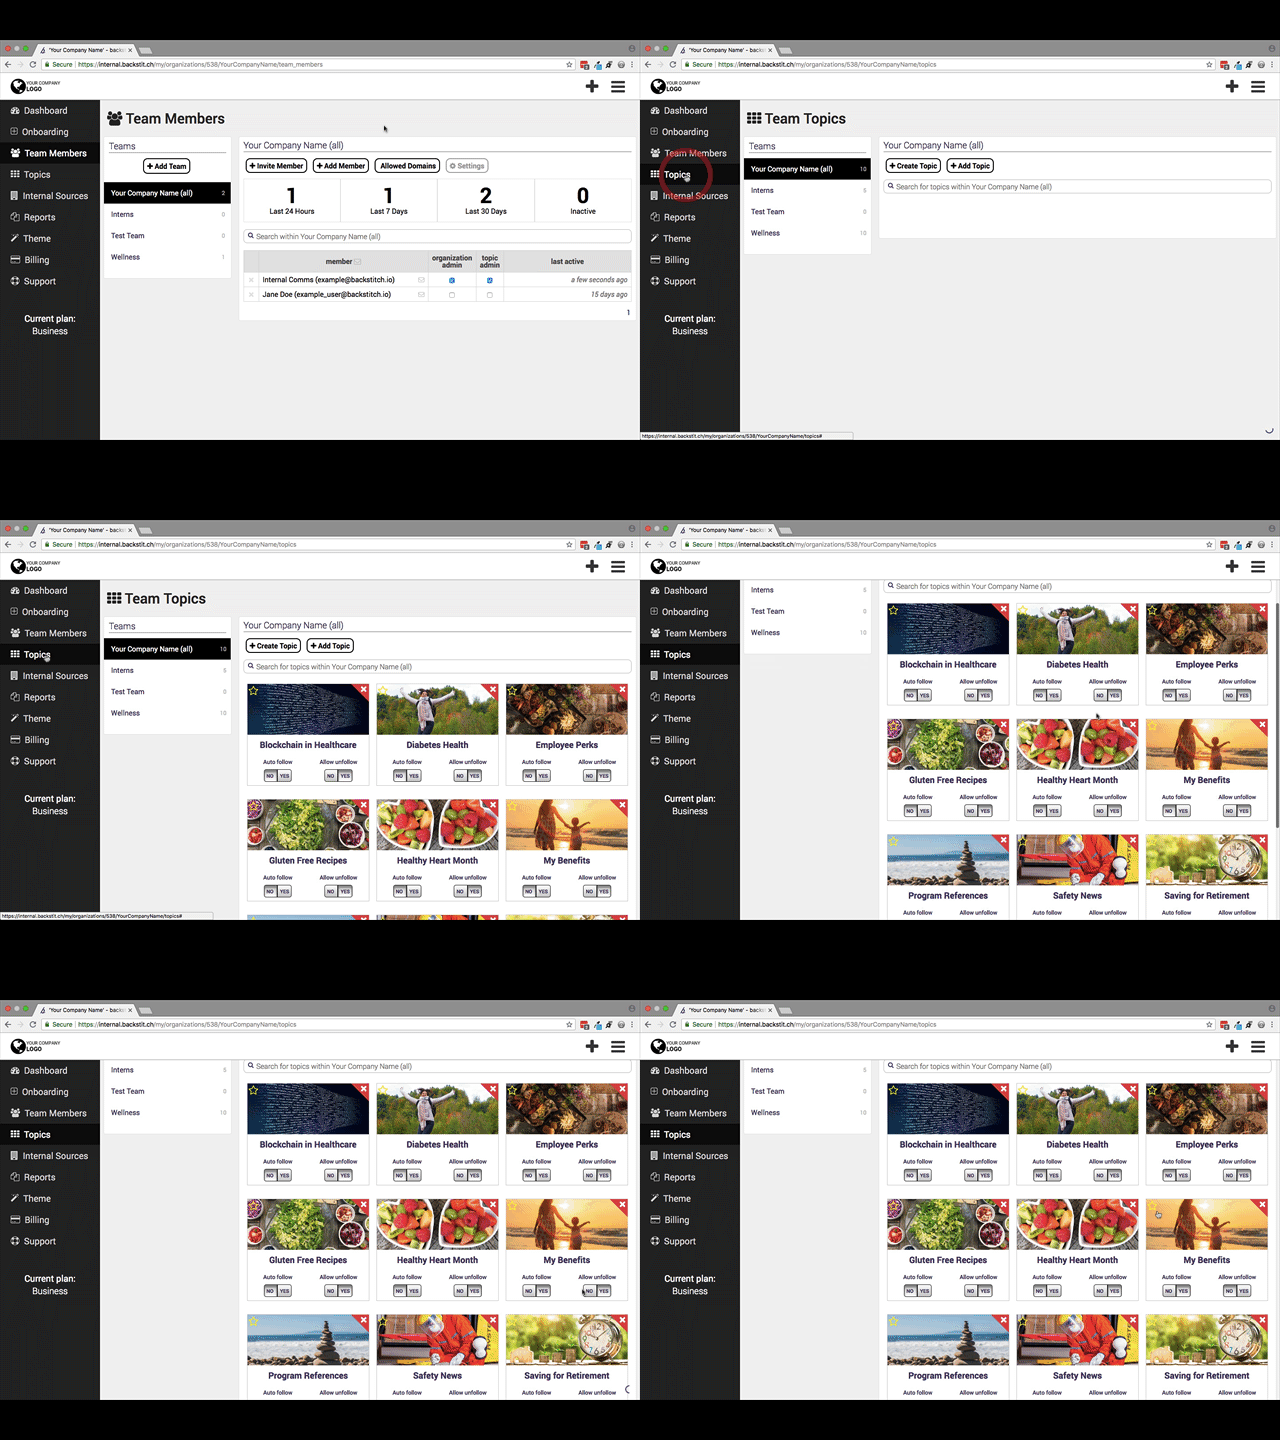
- Click on [Topics] on the left sidebar to view your Topics for specific Teams.
- You can toggle between Teams, remove a Topic from a Team and modify your opt-in settings.
- For each Topic, you can select whether or not you would like to allow Team Members to unfollow it. If the shadow is at the top of the [No] or [Yes] buttons, then it is selected. Your organization might deem some Topics mandatory, while others can be optional.
- In addition, you can also choose Topics you want Team Members to automatically follow the first time they log in.
Step 5: Customizing your Organization Settings
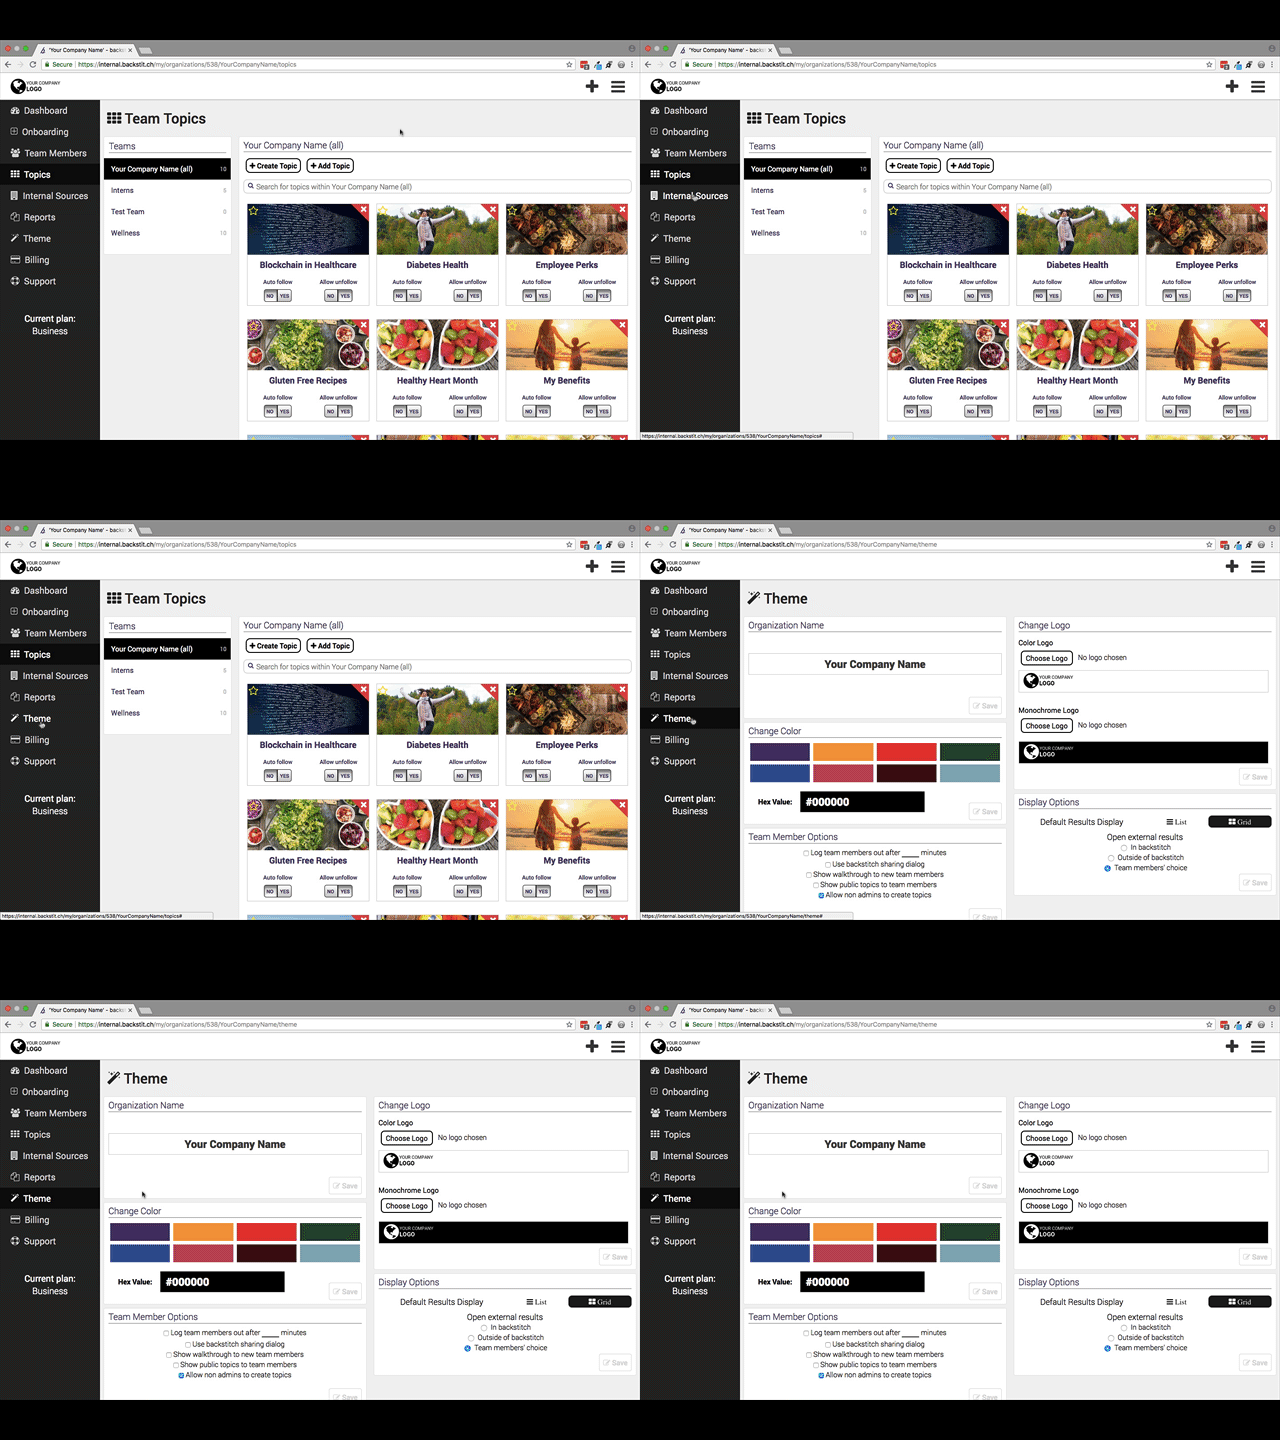
- Select [Theme] on the left sidebar to customize the look to match your organization. This is where you can insert your official colors and upload logos.
- This dashboard also lets you choose Topic display options, from grid to list view or Team Members' choice.
- Admins can also select Team Member options on the bottom, such as allowing non-admins to create Topics, automatic log out and more.
Step 6: Creating and Modifying Internal Posts
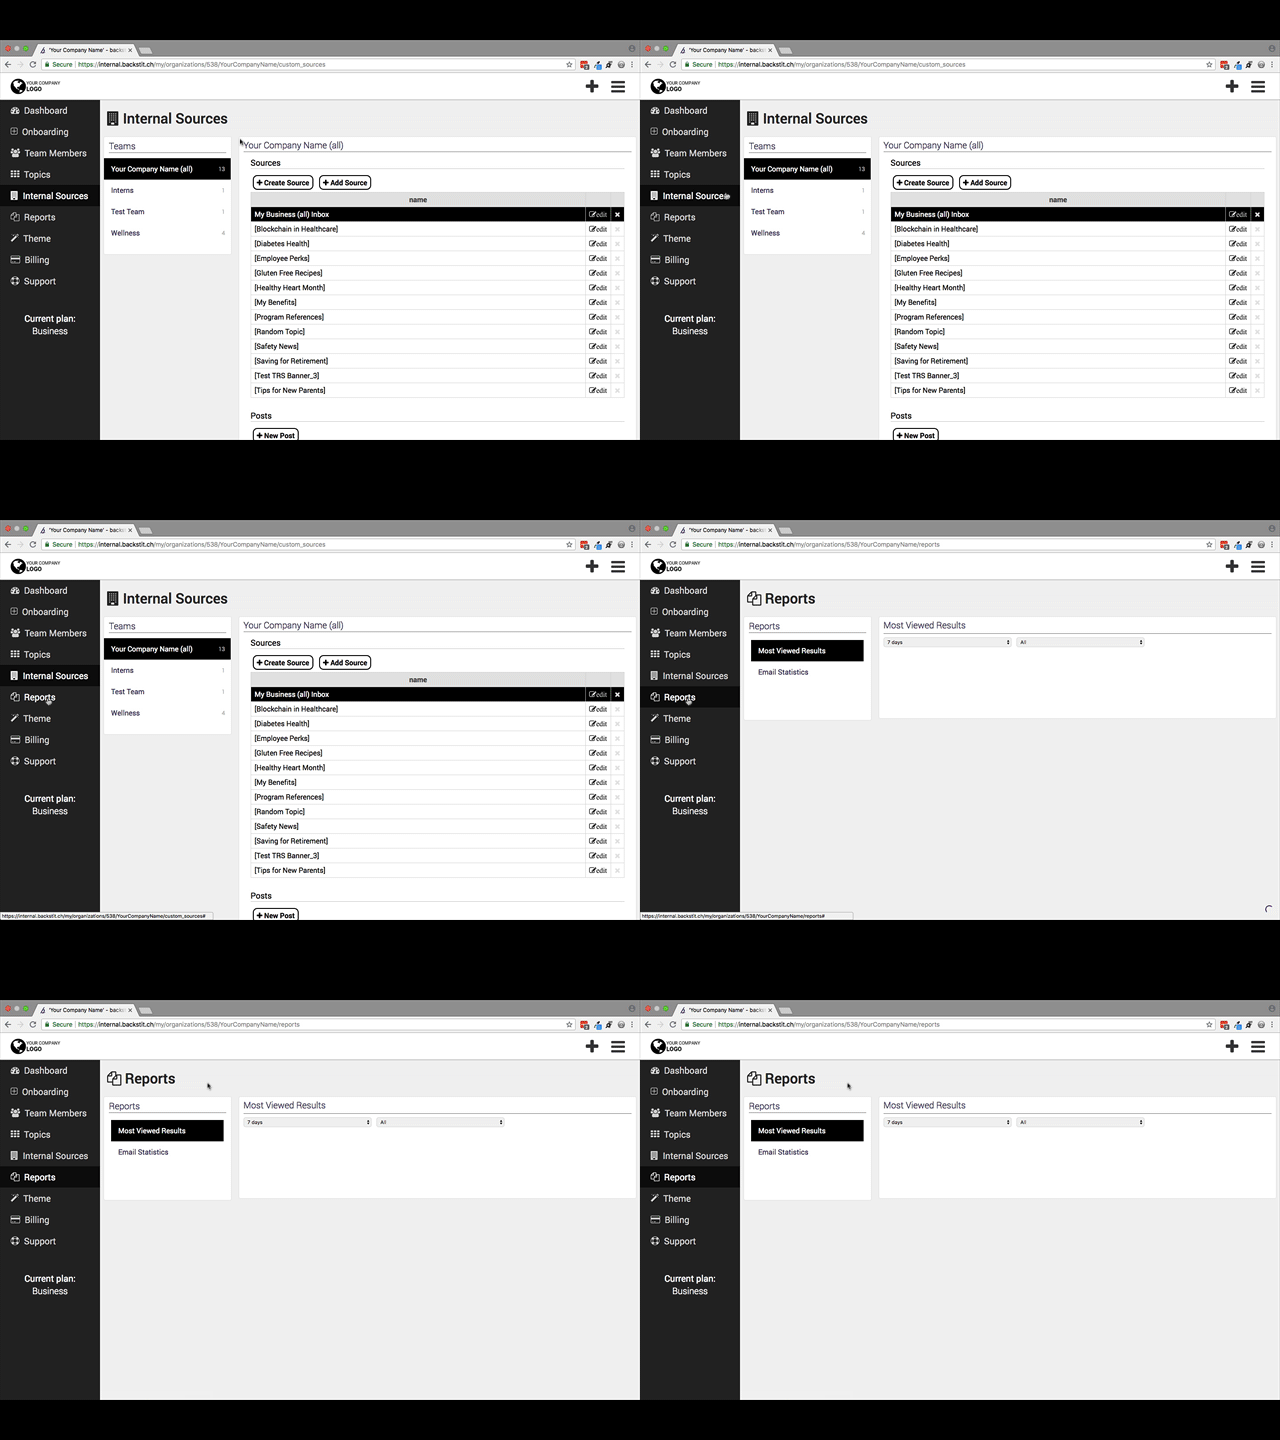
- To view Internal Sources, click [Internal Sources] on the left sidebar.
- You will be directed to a page where you can view all of the Sources that are available to each team. You can also create Internal Posts to include within your Sources.
- A Source is a bucket of information. It can be a folder for your internal content.
- You can create a Source that can be viewed by multiple Teams or decide to create a Source with information that is private for one Team.
- Adjust the Source settings by clicking [Edit] next to the Source.
Click here to learn more about Sources and how to add them to Topics.
Step 7: Reviewing Metrics
- Click [Reports] on the left sidebar to view the engagement analytics of your employee’s behavior.
- You can toggle between most viewed results (counts all clicks) as well as email statistics to see what your employees care about the most.
Need help?
Click [Help] in Settings, underneath the [Hamburger Menu].
