Now that you’ve written a Post in backstitch Studio, it’s time to share it with your audience.
- There are several channels in which you can use Studio to share your content. Sending your message via Gmail is a great option for many organizations who use this email provider and are looking for an easy way to send bulk emails.
- Rather than using your native email platform directly, configuring Gmail with backstitch Studio comes with some added perks. Sending an email via this option uses the backstitch technology and allows your organization to view analytics — such as who viewed your message, when it was viewed and how it was viewed.
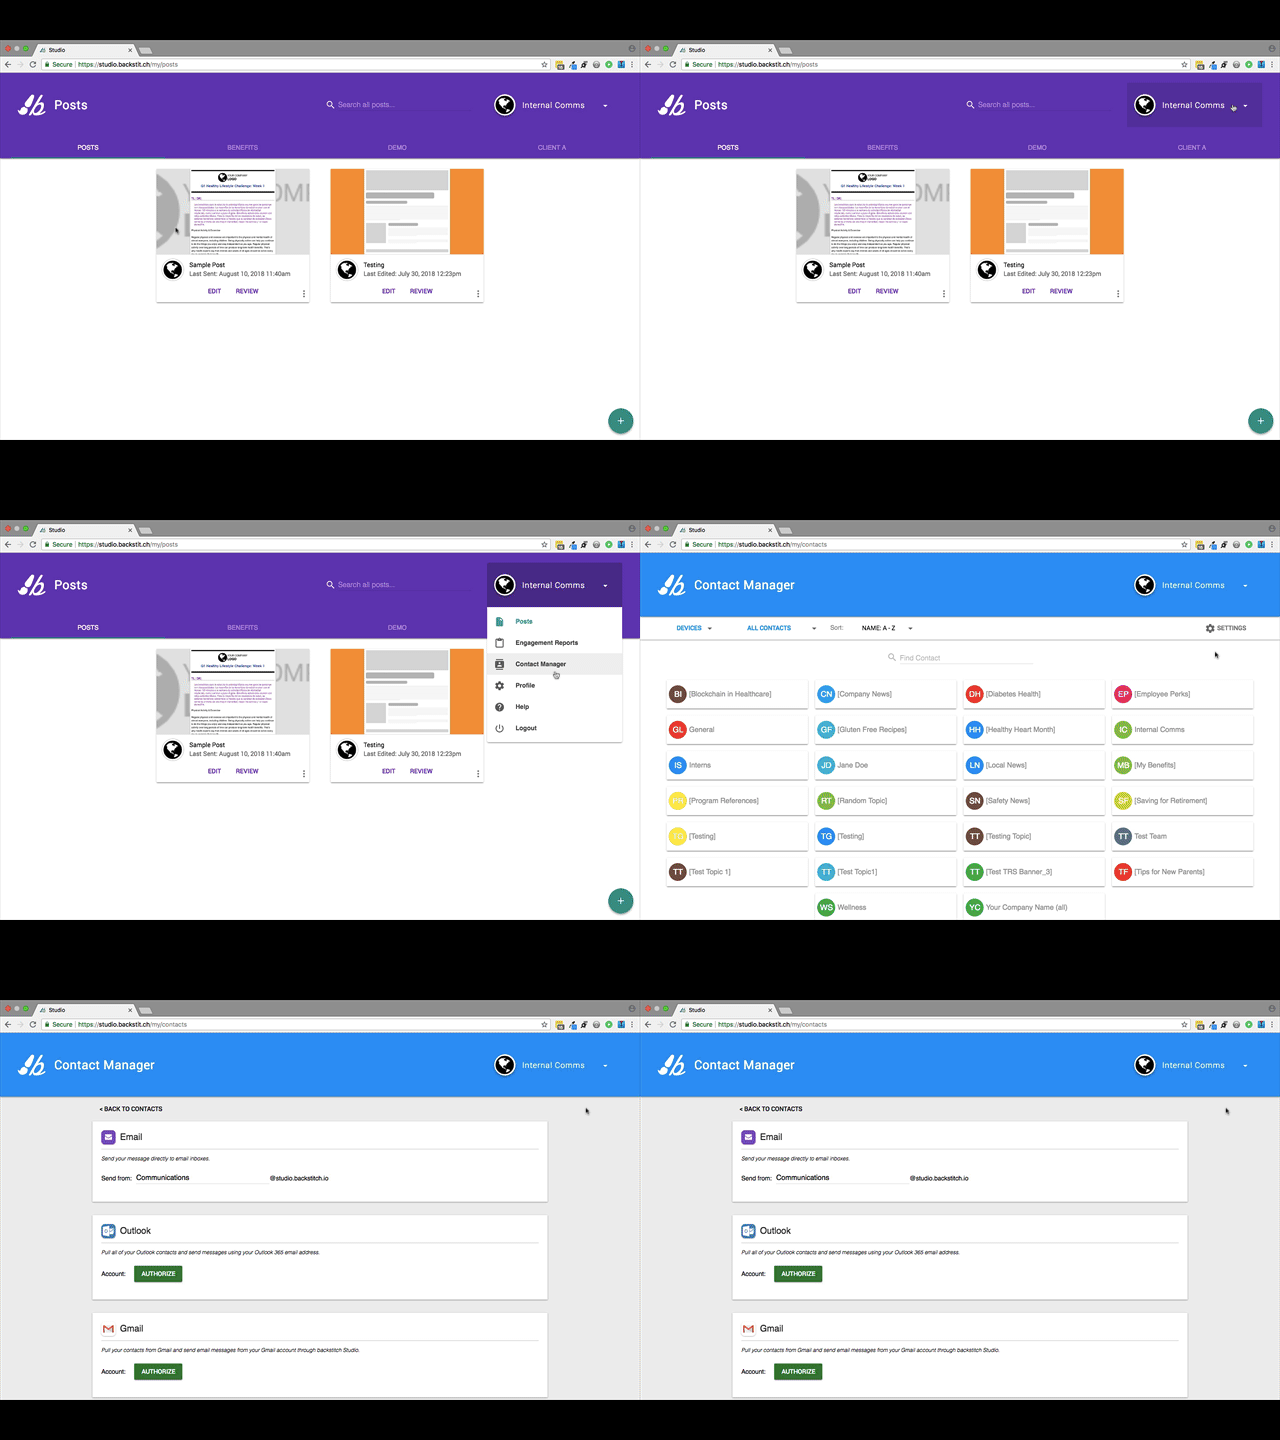
- On your home screen, click the drop-down menu at the top right of your page. Then select [Contact Manager] and click [Settings].
Pro Tip: Syncing your email provider with backstitch Studio will allow your organization to view Employee Engagement Analytics that are not available via your native email provider.

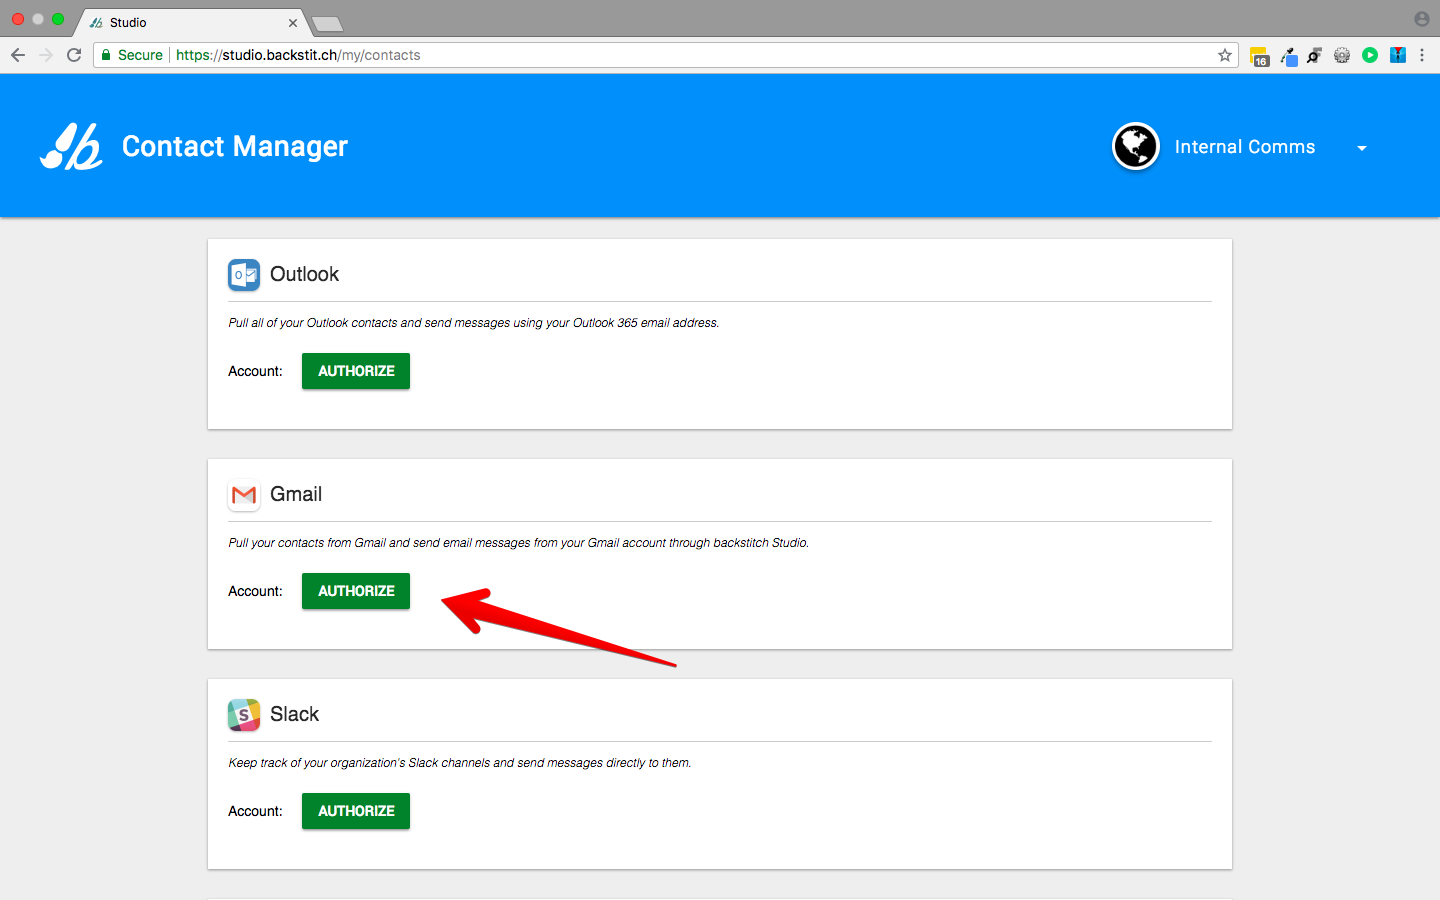
- Scroll to Gmail and click the [Authorize] button.
- This will bring you to a screen where you can enter your credentials. Once you have signed in, you are ready to rock n' roll!

If you do not see the [Authorize] button, and it just shows a button with [Unauthorize] and [Reauthorize] then it means you are already connected, and good to go! If needed, you can reauthorize your account by selecting [Reauthorize].
Caution not to [Unauthorize] as your Contacts Groups will be deleted.

- You can also get to the Contact Manager from any Post.
- Begin by selecting [Review] of the Post you would like to work with. Then select [Add Contacts] to open the dialog box of options.
- At the bottom left, you can just select [Manage] to go directly to Contact Manager. If you don't see the [Manage] button, then those contacts cannot be managed through backstitch (e.g. Slack contacts).
