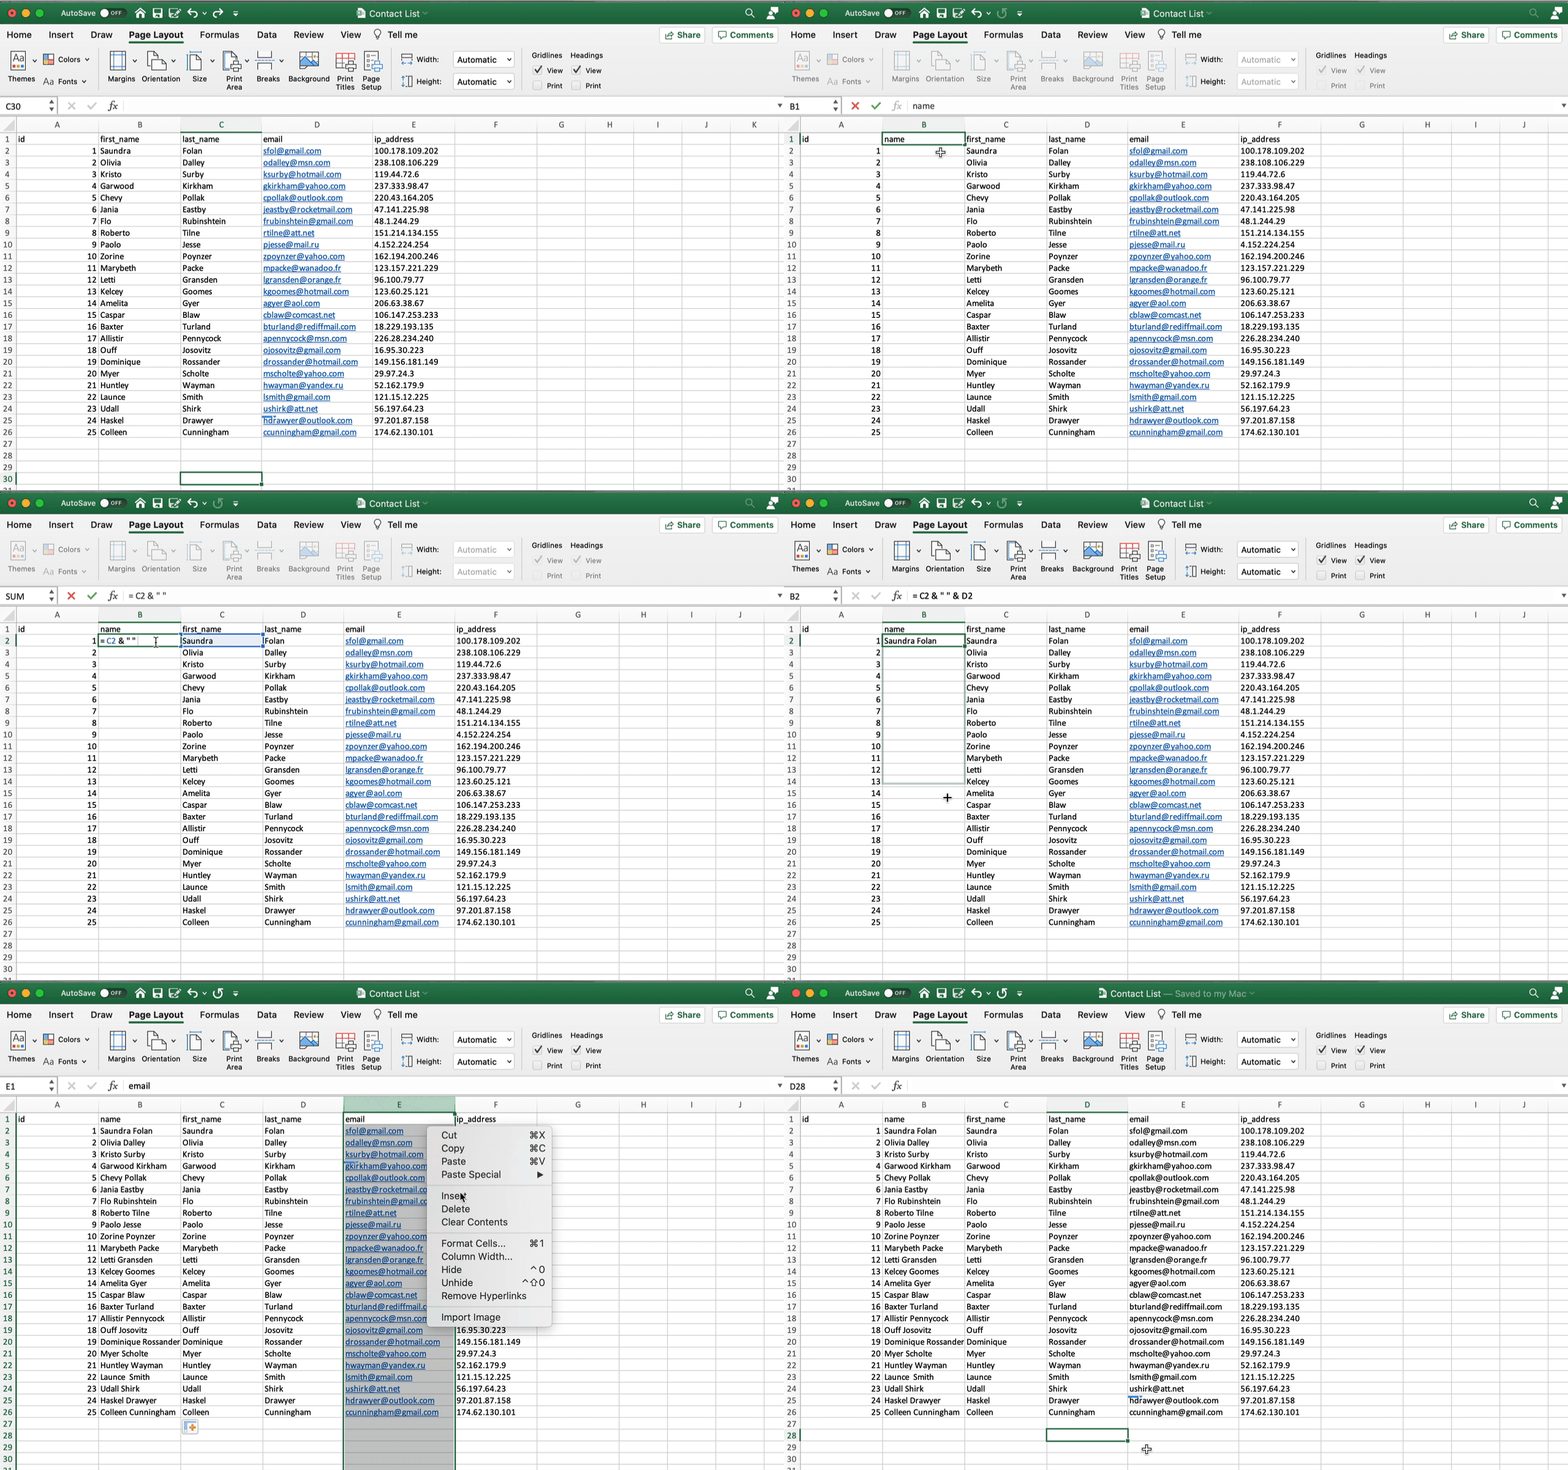
Clean up your spreadsheet to successfully upload a contact list into backstitch Studio.

Contact File Updates
- Within your spreadsheet, make sure all headers are clear and correct
- If you want the first and last names to show up, put them in the same column, not separately.
- To do this, add a new column by right-clicking and selecting [Insert]
- Rename your new column
- Within the cell, type = first name cell &" "& second name cell (For example, =C2&" "&D2 Also, include a space between the quotes to separate names.)
- Then click [Enter]. The combined first and last name should now appear in the new column you created.
- Use the small white "Plus" on the bottom of the cell to paste this formula to the rest of the cells in the column.
- Remove all hyperlinks by selecting the cells with hyperlinks then right-clicking and selecting [Remove Hyperlinks]
- Save the spreadsheet and use it to create a Contact Group in backstitch Studio.
Contact file requirements
- Note: the backstitch Studio Contact Group must have at least a Name and Email address as the minimum number of fields in the data file. The contacts file can contain other fields, but will not be used for generating the Contact in the new Contact Group.
- If you do not have the appropriate Name associated with the email address, please add a value to the Name field. For example, upload 100 Email addresses and use numbers 001 thru 100 for the Name values.
- Columns containing the "Name" and "Email" need to only show those words (no additional characters, blank lines).
-
Pro Tip: When preparing your contact file, be sure to show Name and Email in your first 2 columns (i.e. Column A shows Name, Column B shows Email).
-
Read this article for instructions on how to successfully create Contact Groups within backstitch Studio.
