Photo Carousel makes the most of each Post by allowing users to scroll through multiple photos!
Download a PDF version here - backstitch Studio: Utilizing Photo Carousel
Step #1: Create a new Post in backstitch Studio.
- In backstitch Studio, open a new Block Editor Template.
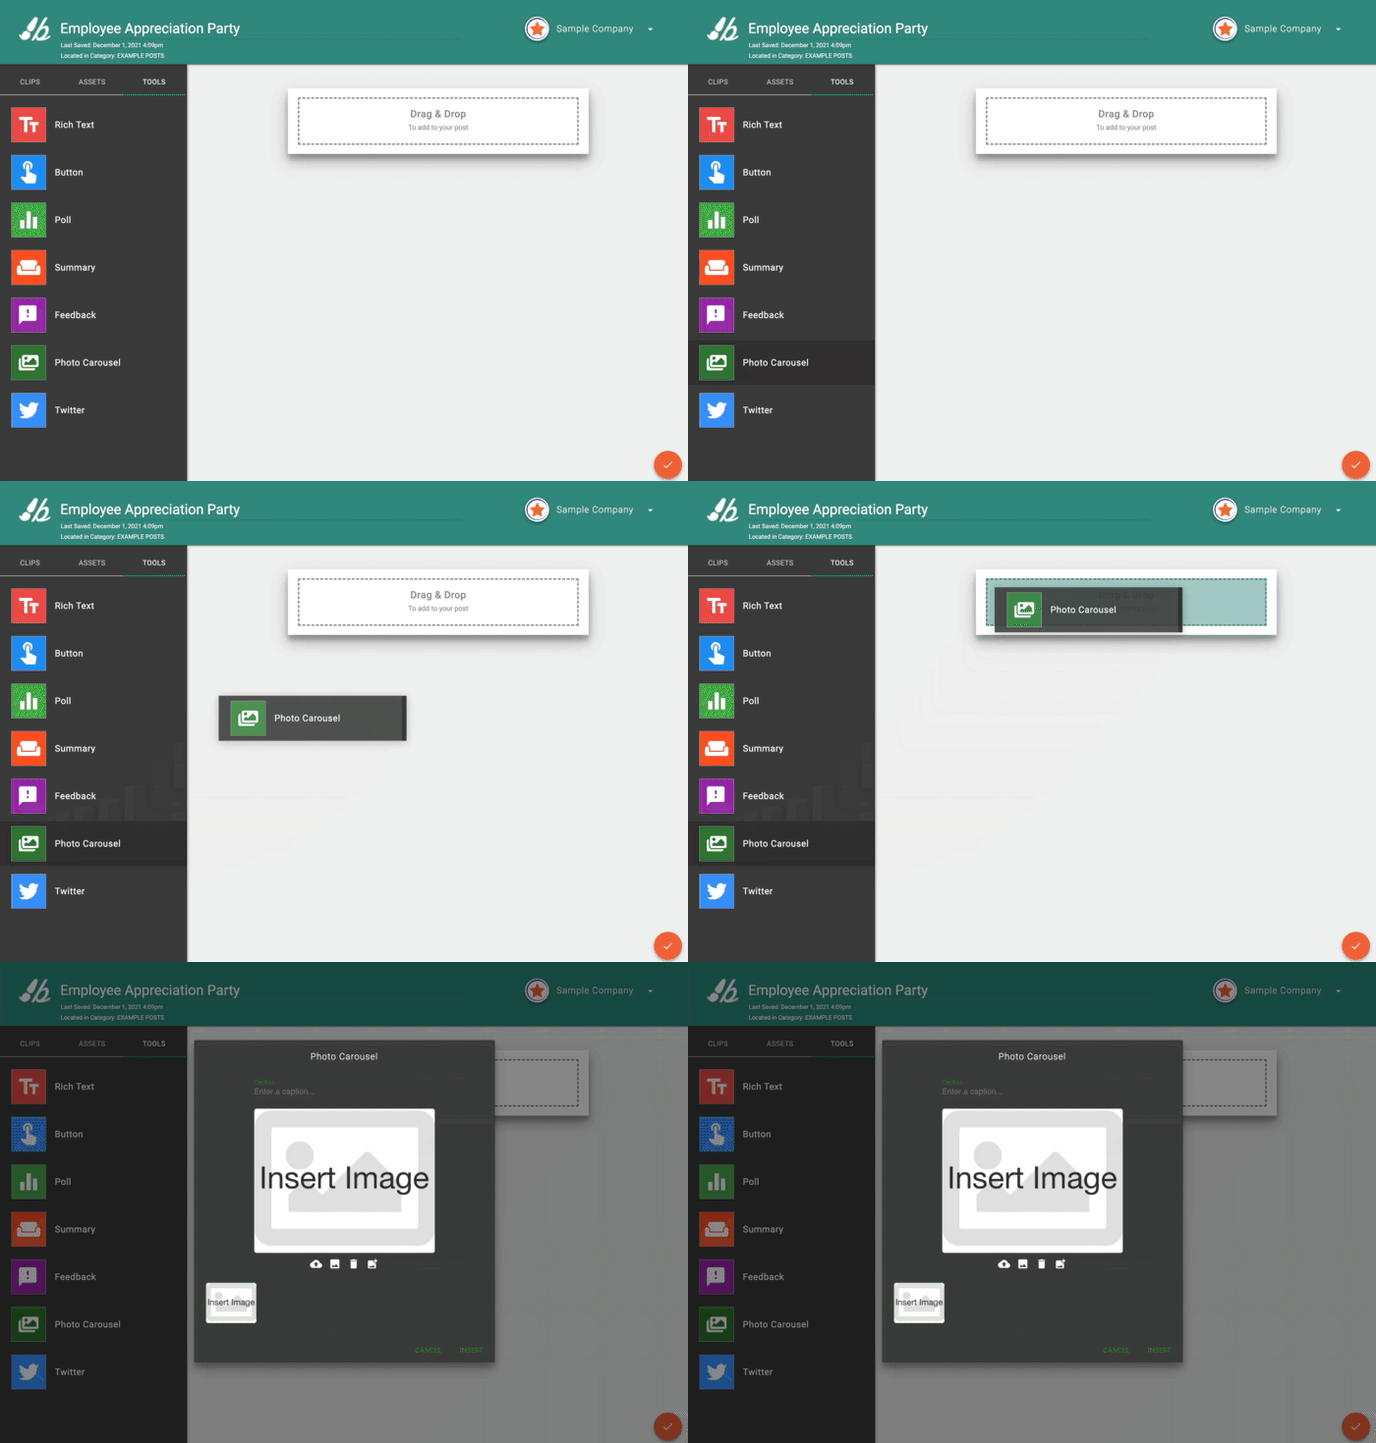
- Select Tools on the left sidebar.
- Drag & Drop Photo Carousel into the Studio Template.

Step #2: Import images to Photo Carousel
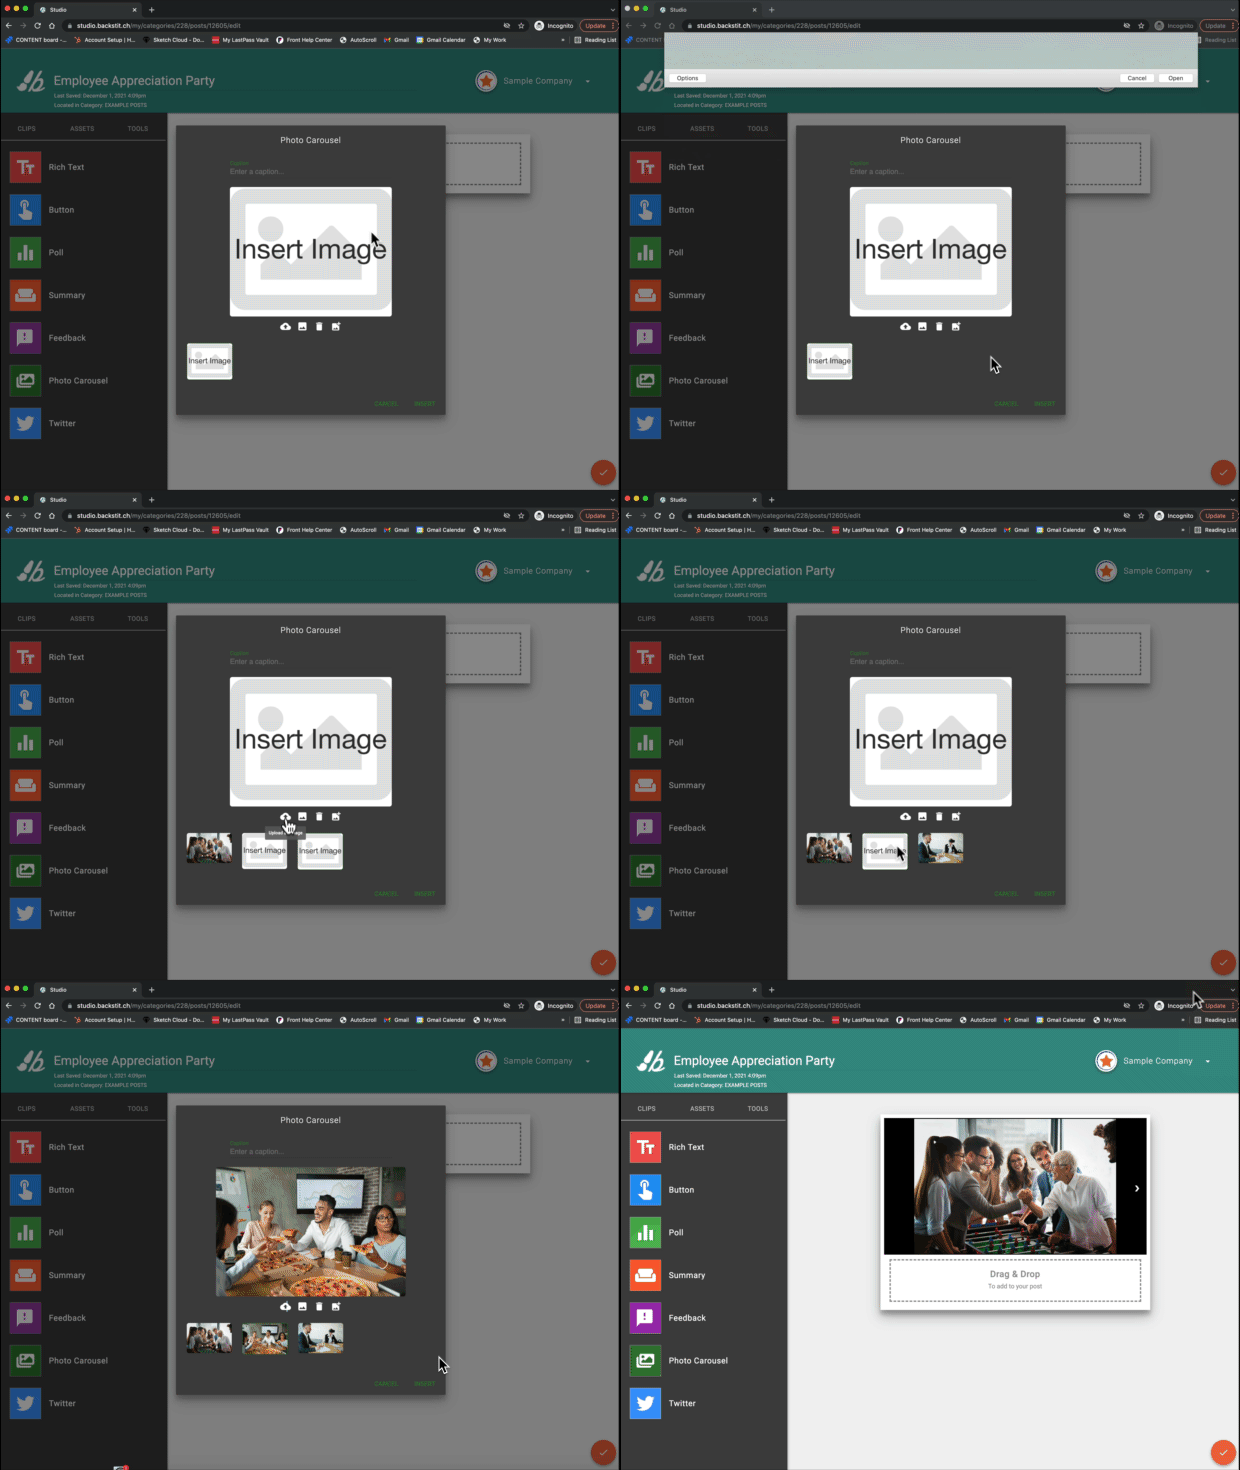
- Select the [Upload Image] icon to upload image from computer.
- Insert images in the order and orientation desired for display in Post.
- Once images have been uploaded, select [Insert] and add any additional content to your Post.

Pro Tip: Insert multiple image windows to organize image order!
Step #3: Publish Post!
- Select [Preview] to view and Publish your Post.
- Select the method in which to Publish your Post.
Pro Tip: Publishing to Email will allow your recipients to open the Post in a separate browser and click through the Photo Carousel!
